Friday, December 22, 2023

WLC on ESXi server

 Today i will explain The Basic installation of vWLC on ESXi server

First need to download the OVA from Cisco web Site https://software.cisco.com/download/navigator.html?i=!mmd
Choose Virtual Wireless Controller
100
and Choose the Version that you need
101
i had old OVA in my PC so i didn’t download anything version 7.3.101
second we need to create two separate VSwitch
my ESXi server IP Address: 192.168.208.48
1
Select Virtual Machine
2
Choose the Network Card3
this is for Management Interface and for Vlan select ALL(4095) since this is connected to a switch trunk port
4

6
Do the Same for Service Port but choose None (0) for VLAN ID as the service port is typically an access port
6A
Now you can see both card
103
go to properties of the vSwitch1 were WLC is there and go to Security Tab and for Promiscuous Mode choose to Accept
104
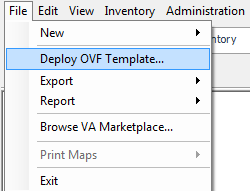
Now start Deploy the OVA Template
7
Navigate to the Folder were i have my OVA
8
Next9

10
Choose a Name for your Machine
11
Choose the Default Thick Provision Lazy Zeroed
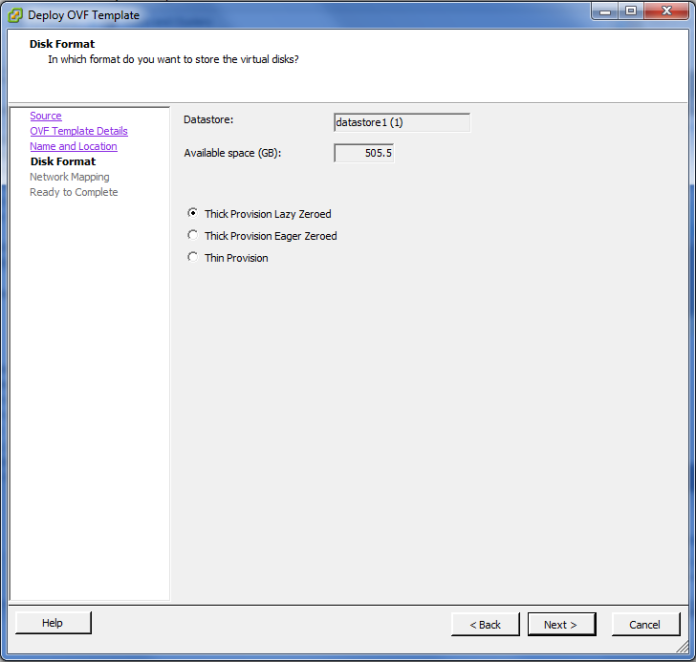
111
Here Choose WLC were your NIC Card Configured for Management
13
Accept
14
Now the Machine is been created
15
for the first network Adapter just select the Service Port 15A
Now Power the Machine for the setup and monitor the Monitor till the vWLC has restarted Automatically16
then Start the Welcome Cisco Wizard
Choose you admin name
IP Address for Service & Management and DHCP
17
Also Choose the Virtual Gateway IP Address and Define your Mobility Group and NTP
if YES in Capital Letter you don’t need to write it cause its the default then you just need to Pres Enter18
Now it Ask you to Save
19
Now it will Reload
20
you can check your IP Configuration after login by using the Command
“Show Interface Summary”
20A
in the Web Page enter the IP Address that you Choose
HTTPS://192.168.200.25021
Press Login and it will ask you for Username and Password22
The First thing you will Notice that
0 Access Point Supported so we need to activate the Evaluation License23
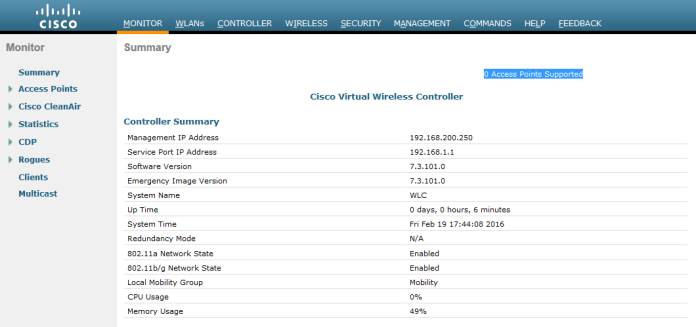
Go to Management Tab and Choose Software Activation then License24
Open the base-ap-count and set the Priority to HIGH25
Accept the (EULA)
26
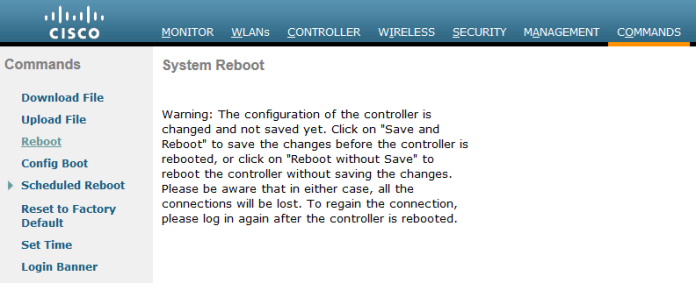
and Reboot so it will be Activated27
Now you can see the Different
200 Access point Supported28
Also you can check the Licenses base-ap-count status
28A
Now go to WLAN Tab and you can see the SSID Wireless that we Create in the Welcome Wizard but I will Create a New SSID from the option in the right corner
Create New Press the GO Button
29
Choose the Profile Name and SSID
30
Check Mark the Status box to enable
31
since this is a Lab we don’t need to put any Security so i choose None
32
Now lets Create an Interface
go to Controller Tab then Interfaces Create New
33
Choose Interface Name and Choose the VLAN ID
34
Now enter the full detail for the Vlan
VLAN Identifier
IP Addresses
and DHCP Address
35
Now I create Groups and assign the AP to a specific Group were it Broadcast specific wireless. we only have one and all SSID is under the Default Group but we will create a New one
Go Back to WLANs Tab then Advanced – AP Group – Create New
32A
Give it a Name and a Description
32B32C
Assign an SSID and Map it to an Interface and Save
32D
Now Start the Action with my Lab Access Point 1242AG
i know its old but old is gold so 36
I didn’t configure any DHCP Option for my WLC so i will use my magic Command to direct my AP to the controller
>lwapp ap controller ip address 192.168.200.250
and as you can see the Wireless start send request to the WLC and going to Download the firmware
37
Now under Wireless Tab i can see my Access Point i will change the AP Mode to FlexConnect since this is the mode supported by vWLC38
go to High Availability Tab and Enter the Controller name and IP Address
39
in Advanced Tab Choose the AP Group Name and change it to HQ group then Apply the wireless should reload and start to broadcast our SSID CCIEROOT40
AND HOLLA NOW I’M CONNECTED
41
i can go to Monitor tab in WLC and check the Client Summary
Click on Detail to See the Client42
and those my IPhone Mac Address and My Dell Laptop43
Done  ;D

Шаблон базовой настройки маршрутизатора Cisco

 В последнее время приходится часто настраивать с нуля маршрутизаторы Cisco (в основном 800-1800 серии) для филиалов моей компании и дабы не набирать одни и теже команды третий десяток раз составил для себя небольшой шаблон настроек на разные случаи жизни. Сразу скажу что сертификаты от Cisco не получал, книжек по данным роутерам особо не читал, весь свой опыт приобрел методом научного тыка, курением мануалов на cisco.com и кое каким вдумчивым заимствованием кусков чужих конфигов…


Итак распаковываем роутер, заливаем последнюю прошивку (для SSH необходим минимум Advanced Security), делаем
#erase startup-config
дабы избавится от преднастроеного мусора и перегружаемся.

Настройка авторизации и доступа по SSH


! включаем шифрование паролей
service password-encryption
! используем новую модель ААА и локальную базу пользователей
aaa new-model
aaa authentication login default local
! заводим пользователя с максимальными правами
username admin privilege 15 secret PASSWORD

! даем имя роутеру
hostname <...>
ip domain-name router.domain
! генерируем ключик для SSH
crypto key generate rsa modulus 1024
! тюнингуем SSH
ip ssh time-out 60
ip ssh authentication-retries 2
ip ssh version 2
! и разрешаем его на удаленной консоли
line vty 0 4
 transport input telnet ssh
 privilege level 15


Настройка роутинга


! включаем ускоренную коммутацию пакетов
ip cef

Настройка времени


! временная зона GMT+2
clock timezone Ukraine 2
clock summer-time Ukraine recurring last Sun Mar 2:00 last Sun Oct 2:00
! обновление системных часов по NTP
ntp update-calendar
! ntp сервера лучше задавать по айпи, ибо если при перегрузке DNS-сервера не доступны то настройки по именам слетают…
ntp server NTP.SERVER.1.IP
ntp server NTP.SERVER.2.IP

Архивирование конфигов


! включаем архивирование всех изменений конфига, скрывая пароли в логах
archive
 log config
  logging enable
  hidekeys


! историю изменения конфига можно посмотреть командой
show archive log config all

Настройка DNS


! включить разрешение имен
ip domain-lookup
! включаем внутренний DNS сервер
ip dns server
! прописываем DNS провайдера
ip name-server XXX.XXX.XXX.XXX
! на всякий случай добавляем несколько публичных DNS серверов
ip name-server 4.2.2.2
ip name-server 208.67.222.222
ip name-server 208.67.220.220


Настройка локальной сети


! обычно порты внутреннего свитча на роутере объединены в Vlan1
interface Vlan1
 description === LAN ===
 ip address 192.168.???.1


! включаем на интерфейсе подсчет пакетов передаваемых клиентам — удобно просматривать кто съедает трафик
 ip accounting output-packets

! посмотреть статистику можно командой
show ip accounting
! очистить
clear ip accounting

Настройка DHCP сервера


! исключаем некоторые адреса из пула
ip dhcp excluded-address 192.168.???.1 192.168.???.99
! и настраиваем пул адресов
ip dhcp pool LAN
   network 192.168.???.0 255.255.255.0
   default-router 192.168.???.1
   dns-server 192.168.???.1


Настройка Internet и Firewall


! настраиваем фильтр входящего трафика (по умолчанию все запрещено)
ip access-list extended FIREWALL
 permit tcp any any eq 22


! включаем инспектирование трафика между локальной сетью и Интернетом
ip inspect name INSPECT_OUT dns
ip inspect name INSPECT_OUT icmp
ip inspect name INSPECT_OUT ntp
ip inspect name INSPECT_OUT tcp router-traffic
ip inspect name INSPECT_OUT udp router-traffic
ip inspect name INSPECT_OUT icmp router-traffic


! настраиваем порт в Интернет и вешаем на него некоторую защиту
interface FastEthernet0/0
 description === Internet ===
 ip address ???.???.???.??? 255.255.255.???
 ip virtual-reassembly
 ip verify unicast reverse-path
 no ip redirects
 no ip directed-broadcast
 no ip proxy-arp
 no cdp enable
 ip inspect INSPECT_OUT out
 ip access-group FIREWALL in


! ну и напоследок шлюз по умолчанию
ip route 0.0.0.0 0.0.0.0 ???.???.???.???

Настройка NAT


! на Интернет интерфейсе
interface FastEthernet0/0
 ip nat outside


! на локальном интерфейсе
interface Vlan1
 ip nat inside


! создаем список IP имеющих доступ к NAT
ip access-list extended NAT
 permit ip host 192.168.???.??? any


! включаем NAT на внешнем интерфейсе
ip nat inside source list NAT interface FastEthernet0/0 overload

! добавляем инспекцию популярных протоколов
ip inspect name INSPECT_OUT http
ip inspect name INSPECT_OUT https
ip inspect name INSPECT_OUT ftp

Отключение ненужных сервисов


no service tcp-small-servers
no service udp-small-servers
no service finger
no service config
no service pad
no ip finger
no ip source-route
no ip http server
no ip http secure-server
no ip bootp server